
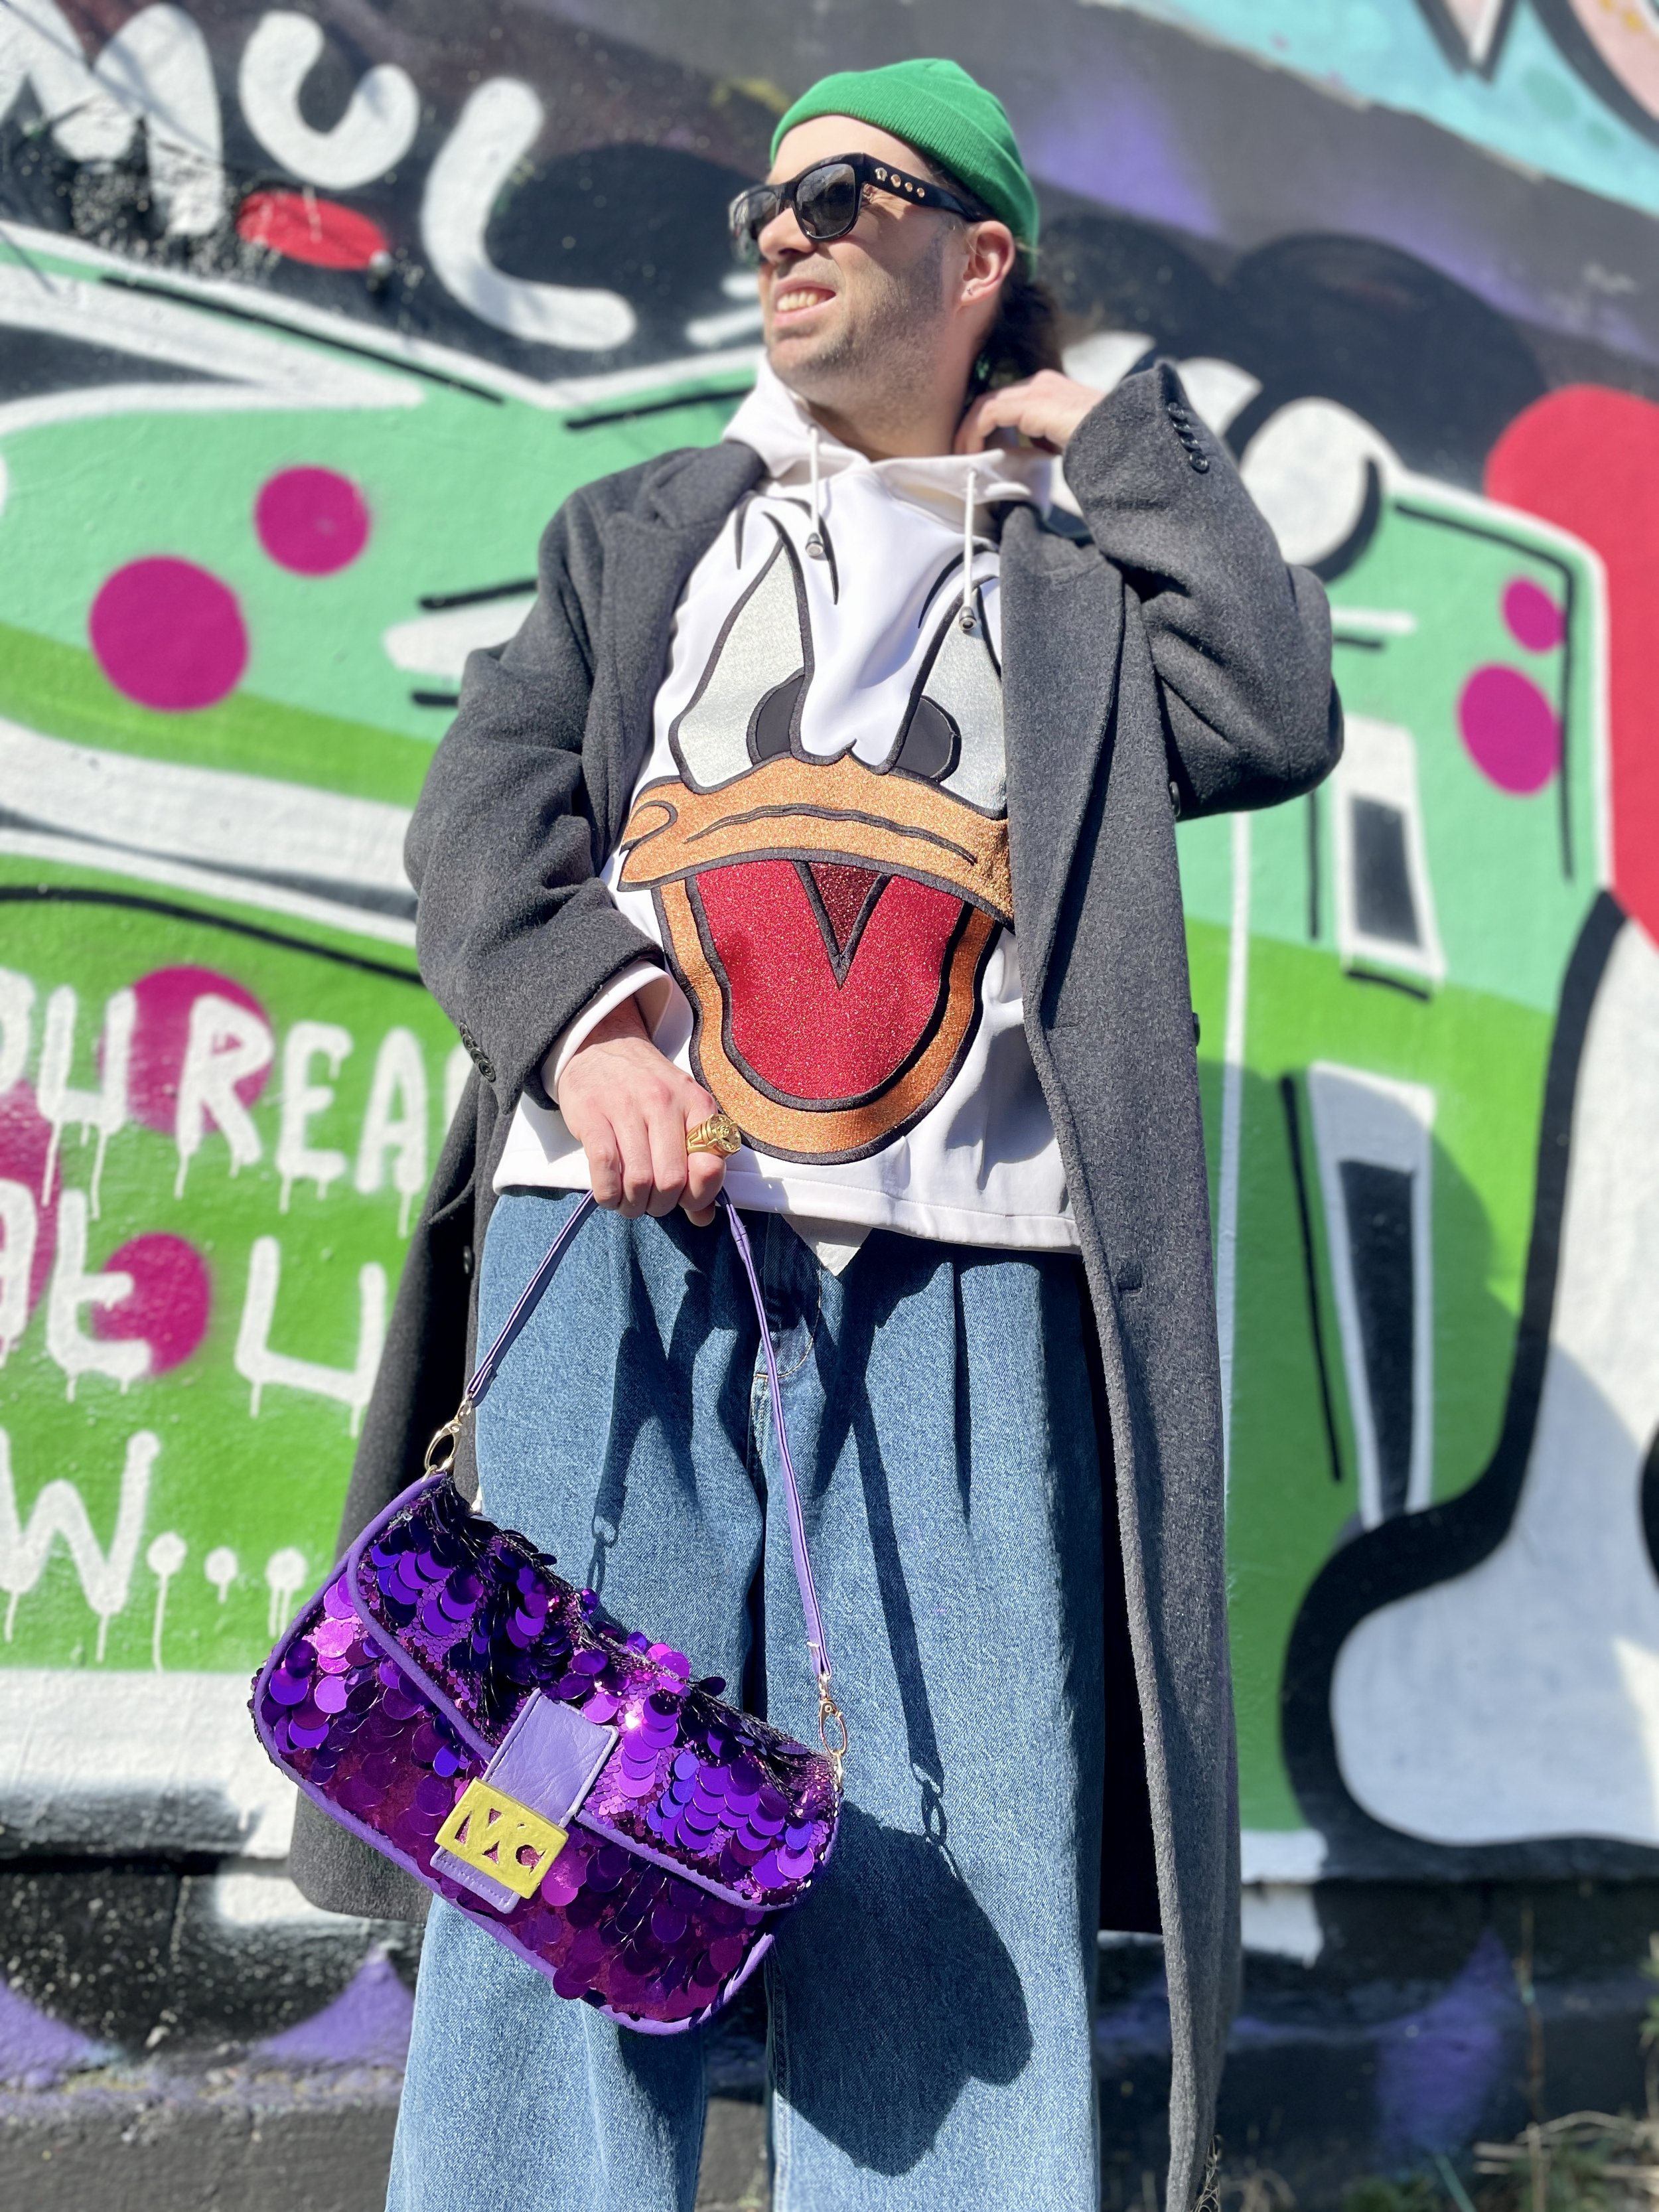
Sequinned Baguette
A few months ago I decided to take a little bit of time off from blogging. One of the things I’ve filled my extra free time with has been indulgently binge-watching the latest Sex and The City series, And Just Like That. I was shocked by how much I enjoyed the reboot, even though I was always a huge lover of the original series. It was not just for the action-packed first episode and bad taste ‘LOLs’ but aaaaaaall the nods to the original series and the iconic wardrobe pieces that made a re-appearance; From Carrie’s blue satin Manolo Blahniks to the infamous Milkmaid dress and the legendary purple sequin Baguette!! Patricia Field reeeeeeeally did outdo herself with the styling on this series- showcasing not just new fashions, such as the Balenciaga-Gucci infused edit, but pleasing us old-timers with the vintage gems. The period of time when the series was first put out was a fashion renaissance in my eyes. Alexander McQueen was at the height of his creative power and the iconic fashion houses had the biggest names at their helms; Marc Jacobs for Louis Vuitton, John Galliano at Dior and Tom Ford for Gucci and YSL Rive Gauche. More importantly brands did not shy away from the glamour in the way that they seem to now.
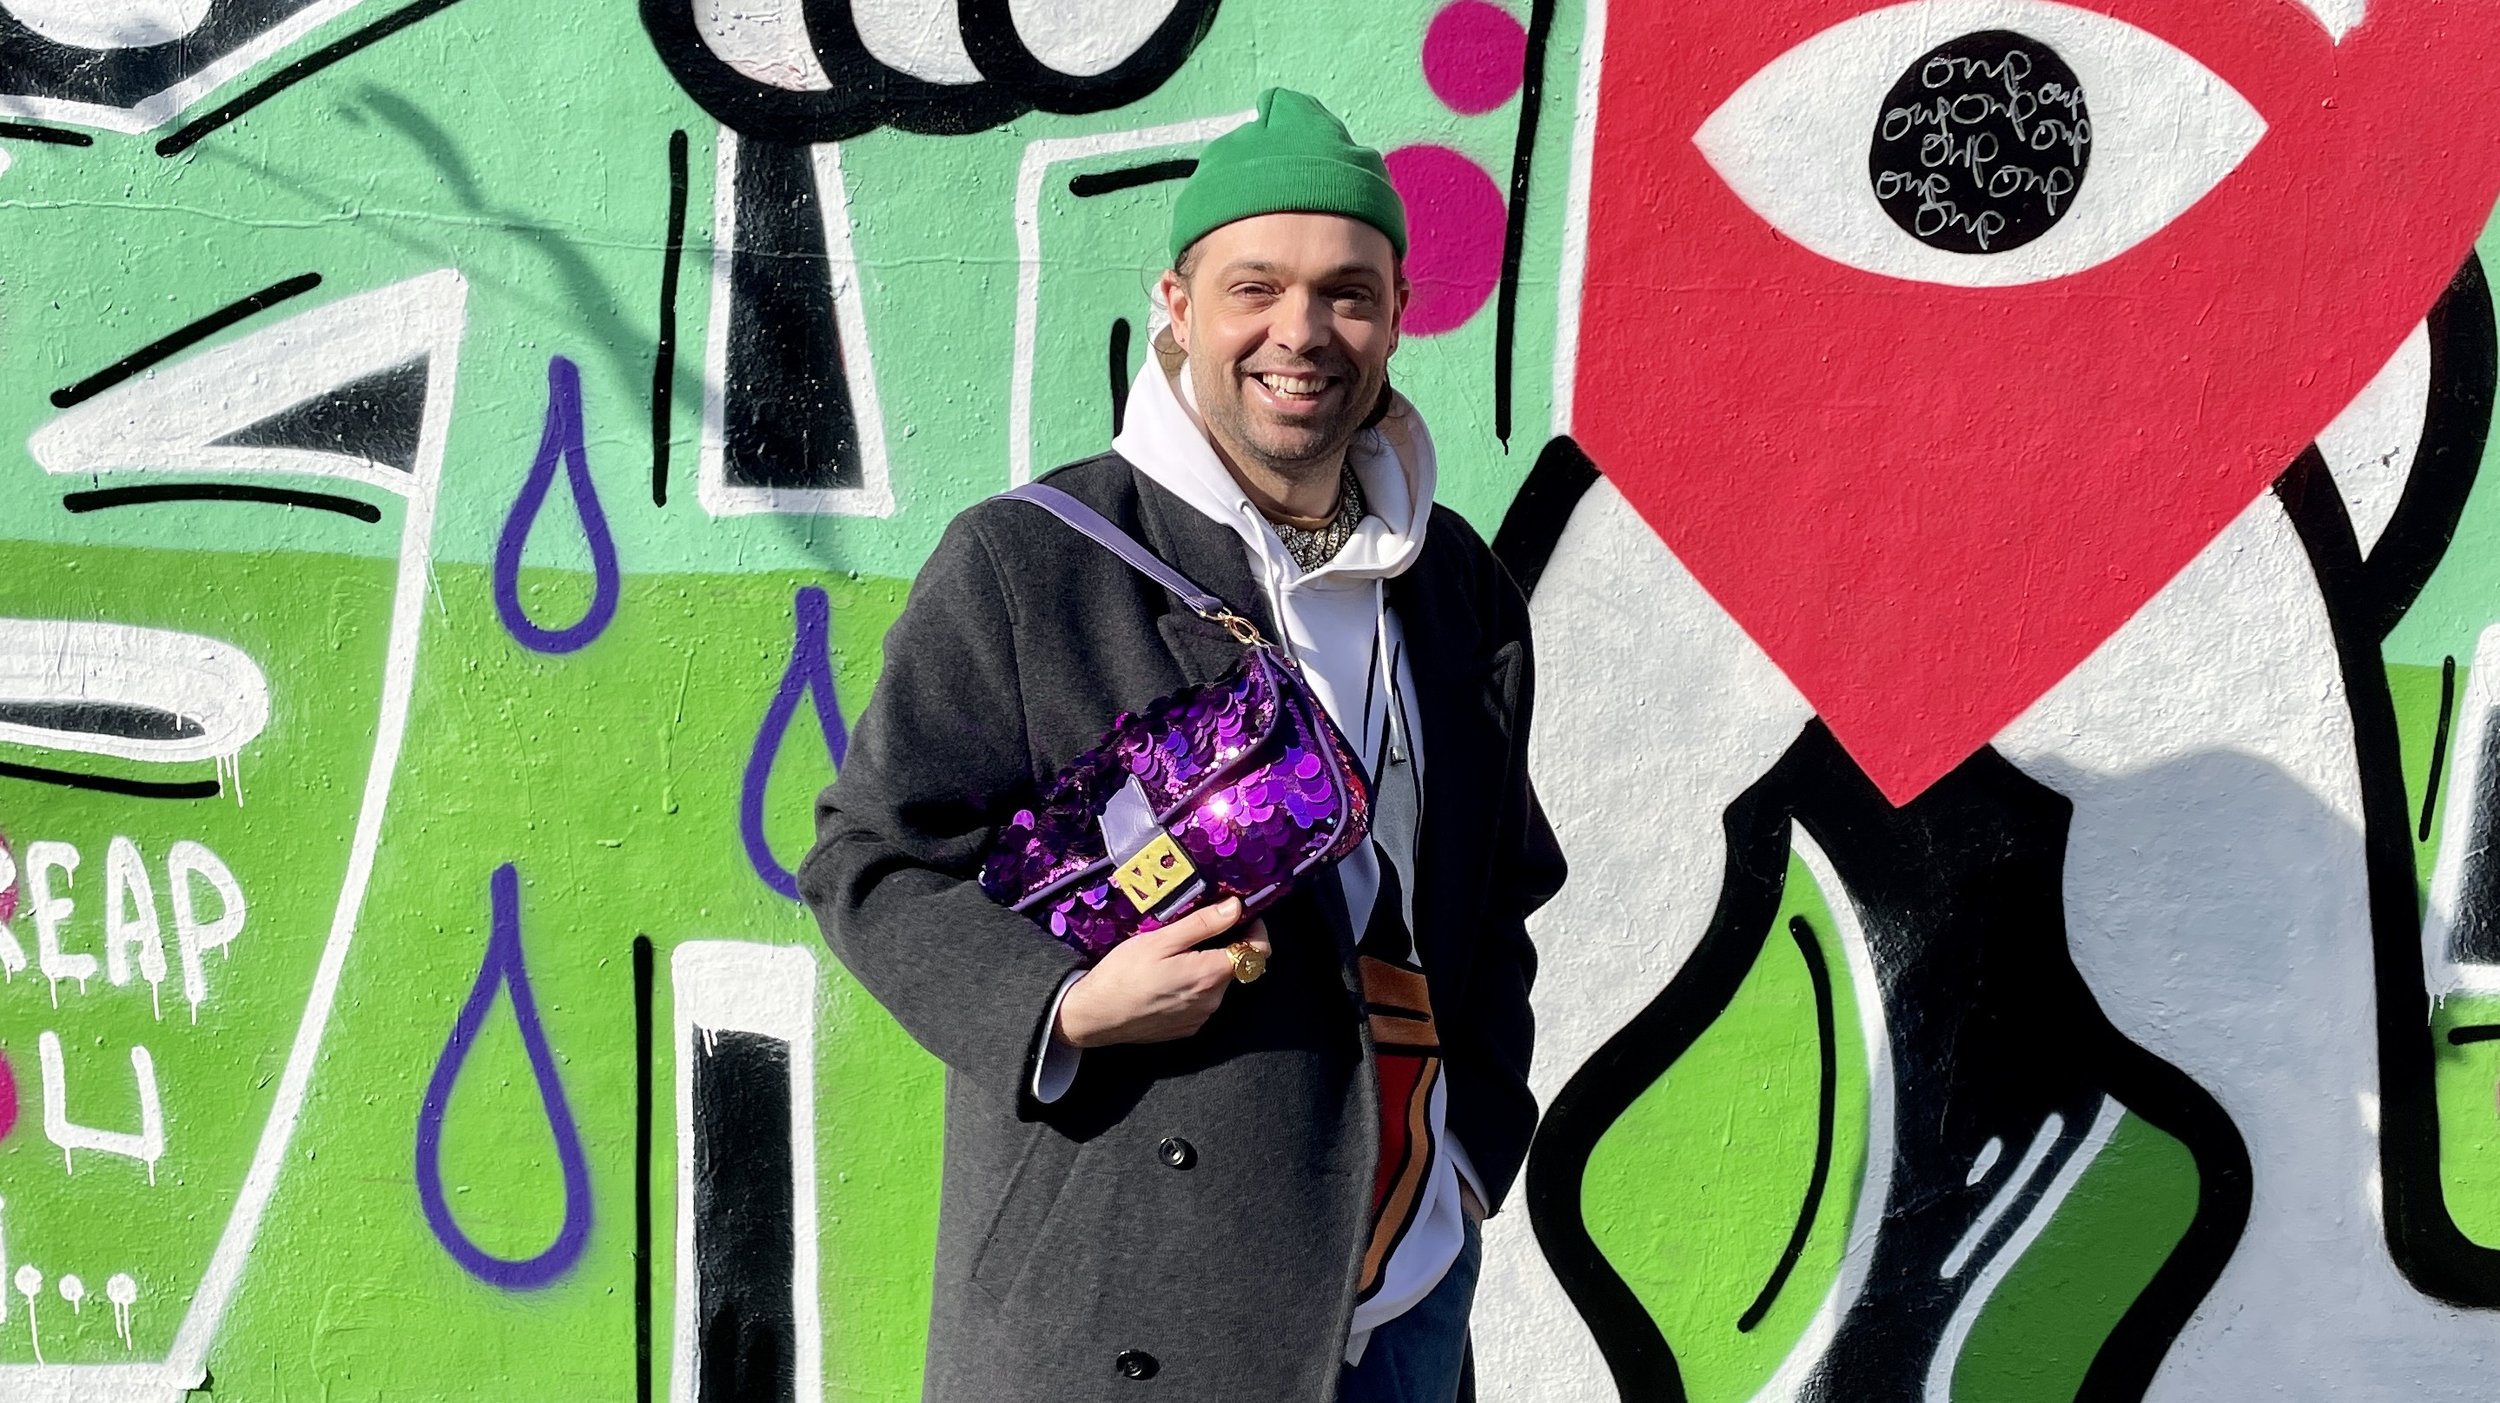
The Fendi Baguette was a must-have for any fashion-forward 20-something in the early 2000’s and some say it became the first IT bag, no doubt helped by the popularity of Sex and The City. Of all the bags that Carrie carried throughout the years on the show, the Fendi Baguette remains the most memorable. This iconic bag first appeared in the infamous robbery scene from Season 3 of the show and created the famous quote “it’s a Bag-uette, Sir”. Saying this, I do wonder how Carrie managed to get the bag back from the robber for the newer series LOL! When Fendi decided to re-release a modern take of this bag fans went wild for it. The new edition of the Baguette was almost a carbon of the OG, minus the price point haha. 20 or so years have passed and inflation has rocketed since. Sarah Jessica Parker also lent a hand at designing a fuchsia version of the infamous new take on the Baguette, which appeared as an Easter egg in episode 9. The bag was available to purchase from mid-February and you might be shocked to know it sold out! Fendi has also re-released the 1997 version of the Baguette for a meer £2,850 in yellow and black sequins. Even with my love of this bag I always knew I would never be able to own either version so I decided to go and make my own!
What I used to make the bag:
Sequin fabric
Duck canvas fabric
2m flanged piping
Polyester thread
Leatherette fabric
A handful of larger sequins in matching colour to the fabric
x2 d-rings
x2 lobster claw swivel catches
x4 rivets
Magnetic closure
12cm closed-ended zip
Resin
Silicon putty
Glitter
PVA
Gold Posca marker
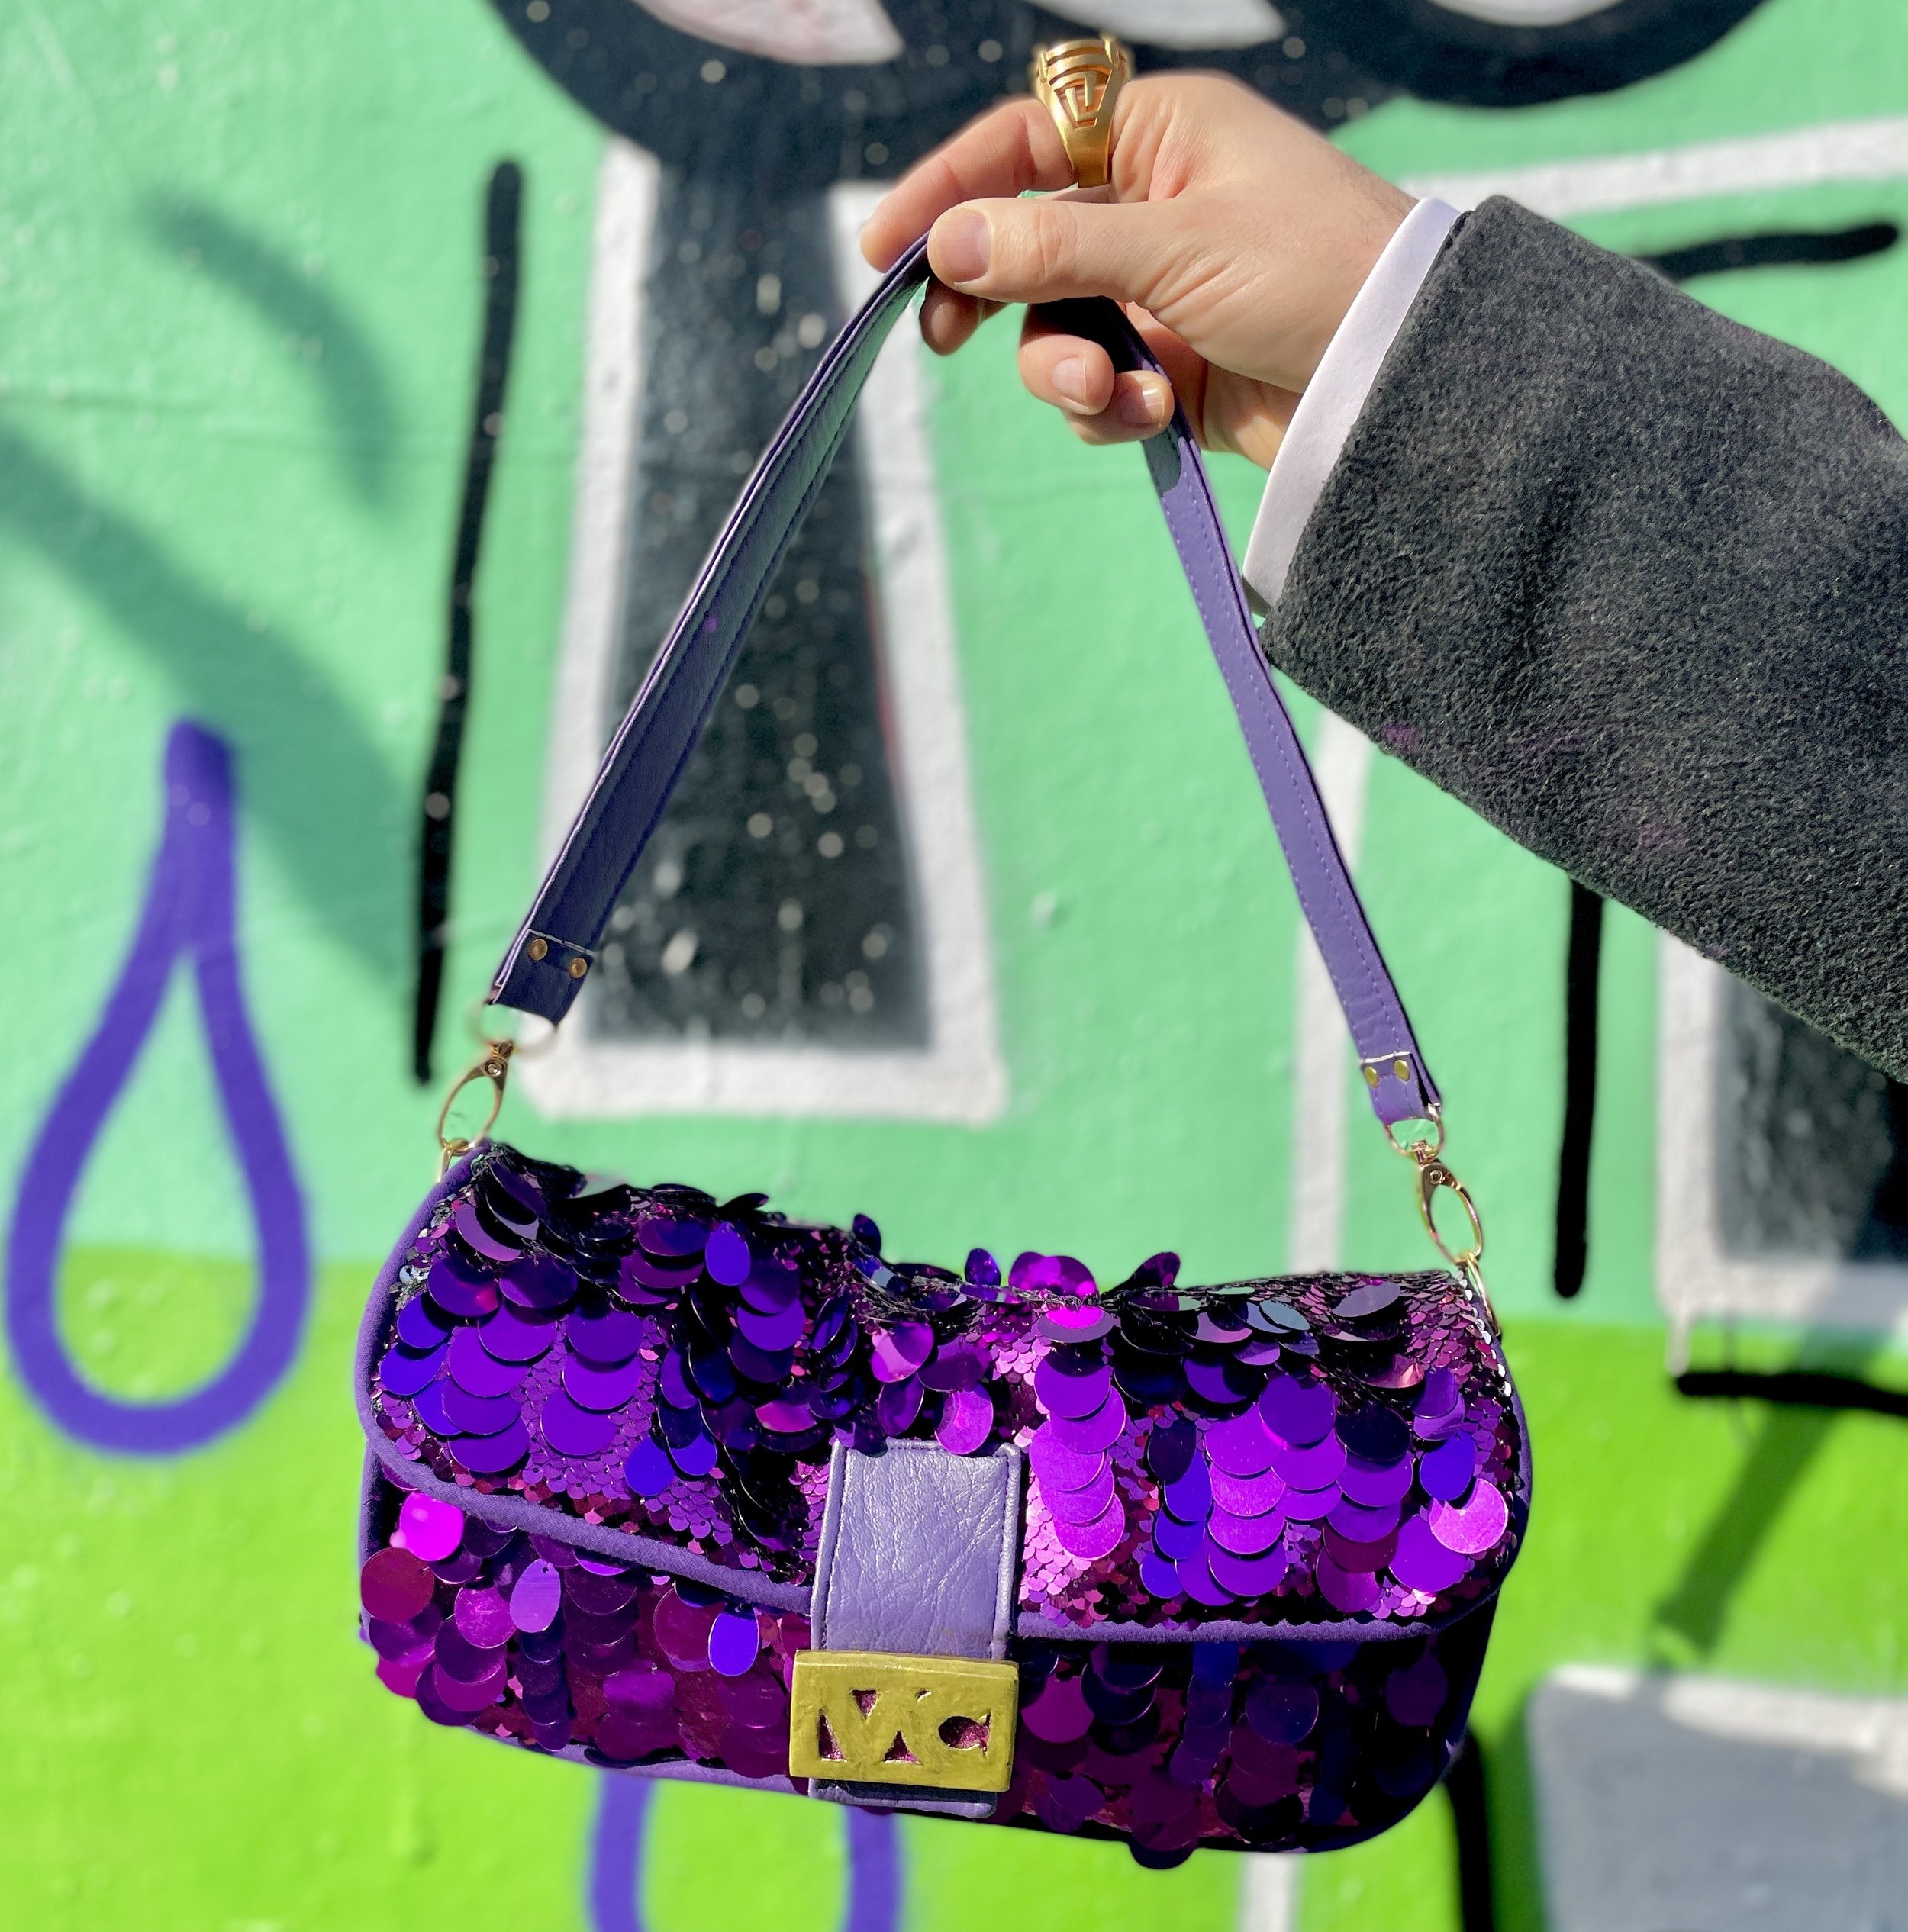
I spent hours staring at online pictures of these bags looking at the dimensions, buckle size and shape, type of sequin used and even the closure. I cherry-picked the best parts from both editions and threw them together to create something I knew I’d love. I went for the overall size and shape of the OG but I loved the idea of a removable strap like the newer version has. The sequins used on both were the exact same. I loved the shape and colour of the sequins Fendi used but it was a real struggle to find both sequin fabric AND loose sequins. I bought the most PERFECT fabric that matched the Fendi colour but I couldn’t find the larger sequins in the same colour so I ended up going for more of a pink. I do love this colour but I had my heart set on the cooler, more blue fabric.
Regarding the size of the bag, I wanted it to be as close to the vintage Baguette as possible so I googled ‘vintage Fendi Baguette for sale’. I went straight to the item description and found the dimensions of the bag. When I saw the size I was worried that it would be a little too small so I added a few cm to the length. I thought this might help the buckle size too so I would be able to get a little more detail on it.
One thing I really wanted to do for this bag was somehow find a way to cast my own buckle. I spent many an hour searching online for the best way to do this. To determine the size of the buckle I took the measurements from bag for sale online. I then counted how many times it would fit into the bag and scaled it up to the overall size I was going for. I am a NIGHTMARE for working out how to measure something and at times go to pretty extreme lengths to get it as right as possible LOL. I decided to make the buckle out of air-drying clay. I went for a buckle 4cm x 6cm. Before I rolled out any clay I designed it on paper then cut out a template from acetate so that I could get it as perfect as possible. I rolled the clay out and cut a 4x6cm rectangle out (using the acetate template). I then did the same but with the surrounding area of the letters cut out. I then placed this onto the plain bit and smoothed out the join with some water and allowed it to dry overnight. Once the clay had dried parts had cracked so I filled this in with some more clay to smooth the design out as much as possible. This took a few days to do as I was obviously stretching the clay so then when it dried it cracked again. Once I was happy with the look of the buckle I looked at how I was going to cast the little bleeder haha. On Amazon I found an amazing silicone putty that you can cast up to 50 times from once it has set. It only cost £11 for 300g and I didn’t even use a quarter of the putty for this buckle. All I did was mix the two components of the silicon putty together then press it around the clay buckle. You only need the cast to be a millimetre but I did it quite thick hoping the cast would last a little longer. After waiting for 5 minutes for the silicone to dry I removed the clay buckle. Bits of the clay had broken off and embedded into the silicone. This was easy to remove with some warm water and a brush. For the resin to set perfectly you need to add 2 parts resin and 1 part hardener. To get the right measurements I filled the mould with water then poured it into a small jug. I divided the measurement by 3 then multiplied it by 2. With these amounts, I then marked on a small mixing jug then poured each resin component to the right mark on the jug. It did take a good few days for the resin to set but one thing I had to remind myself was that I could always sand down any rough edges once it was set and removed from the mould.

One issue I came against while making this bag was how soft and thin the sequin fabric is. I wanted the bag to slouch but because the fabric was thin and the sequins on the outside were heavy it didn’t give the bag any structure. I came up with the idea of stitching the sequin fabric to some PU fabric. This really helped and made the sequin fabric much easier to work with as it liked to move when the right sides were facing while stitching. Using flanged piping around the edges also helped to stabilise the fabric too. I tend to go for a larger sized piping A) because it helps with strengthening the bag and B) because helps to hide small flaws LOL.


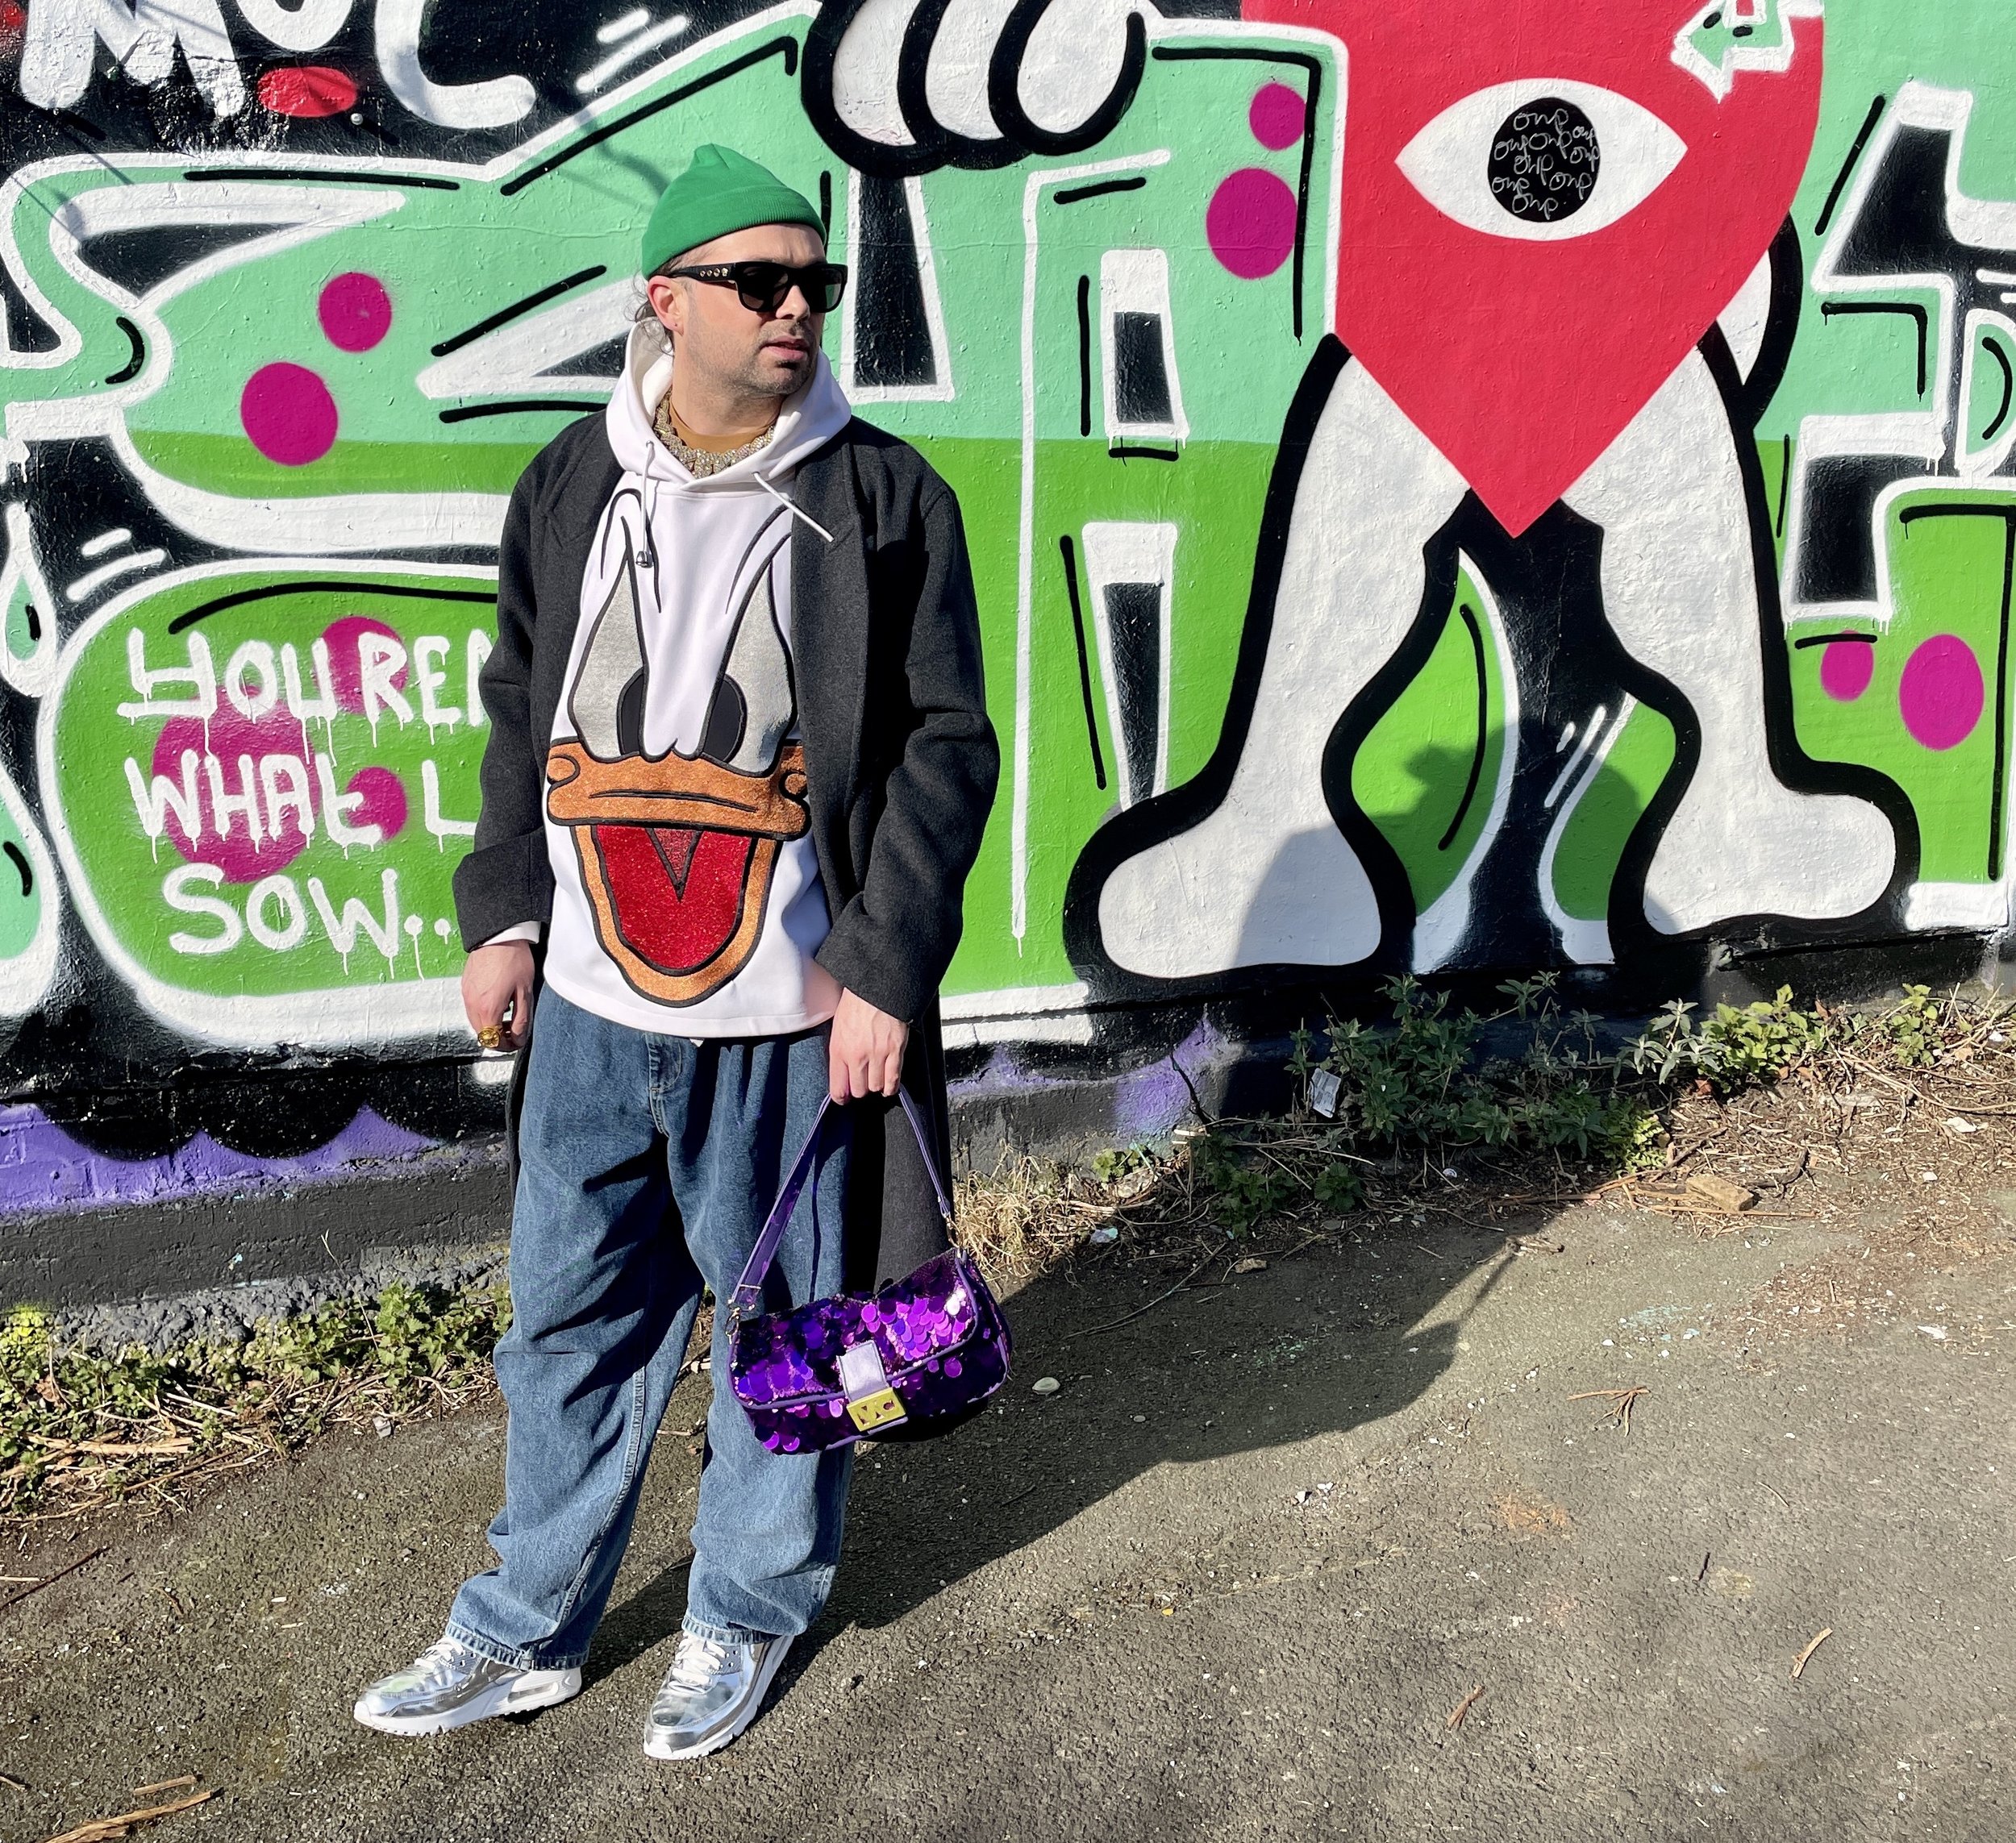
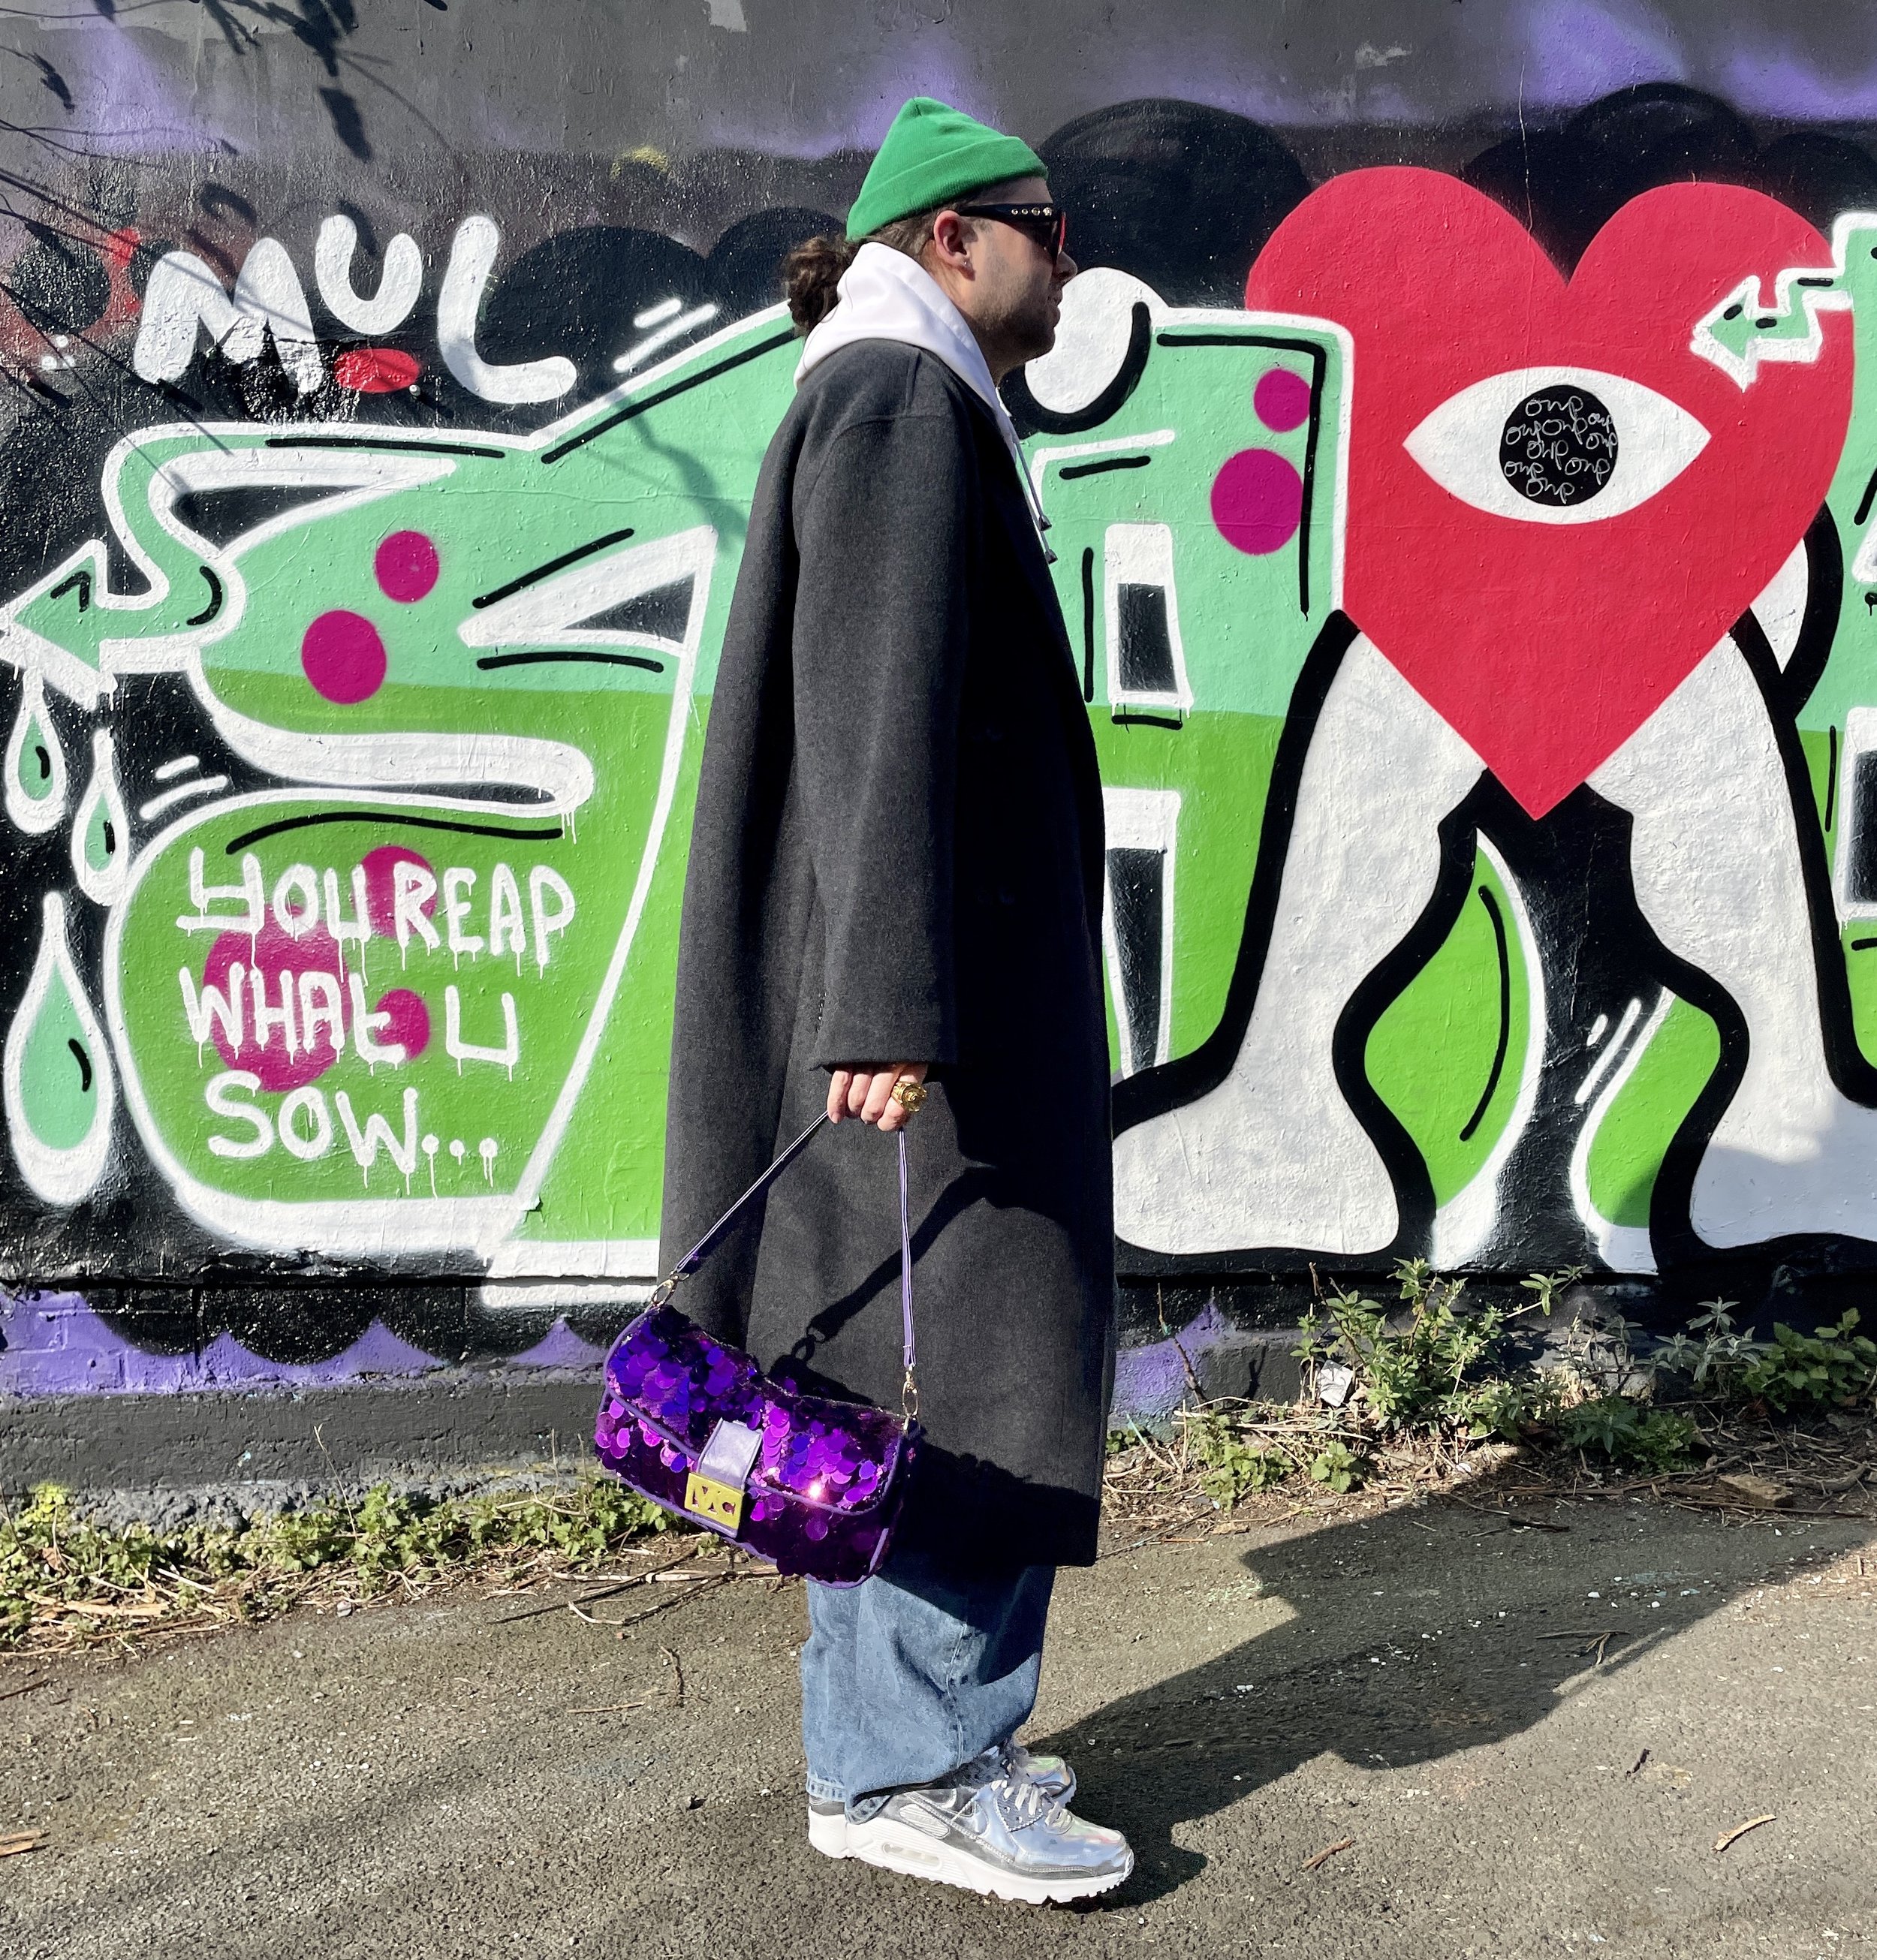
Hat, Coat, t-shirt - ASOS
Hoodie - Bobby Abley
Necklace - Moschino
Ring, Sunglasses - Versace
Jeans - Zara
Trainers - Nike