Mummy Bag
I love making bags, and I LOVE Halloween so the ideas behind this blog work perfectly together. I really wanted to make myself a bag based on one of the classic horror movie monsters; Frankenstein, Dracula, wolfman, Creature from the Black Lagoon or the Mummy. I do love each of these characters for their own reasons but as I said in the last blog, Frankenstein is my all-time fave………….. but I thought that making a bag of him might be a LITTLE difficult and I have already referenced him in a Halloween blog this year. I decided to go with the Mummy as I already had most of the stuff I would need to make this bag and thought it would be fun to use torn fabric for the bandages and this monster is a pretty under-represented monster in my eyes. Last year just before we plunged into the second lockdown at the end of October, I bought a scarf from Lush. The scarf was covered in brightly coloured eyed mummies. Lush sells the best-printed scarfs to wrap up your purchases using reusable materials. Obviously, with the lockdown, this scarf just sat in a drawer for almost a year and I have been itching to whip it out and use it ever since. The Mummies on this scarf are incredibly cute and provided the inspiration for this bag.

The first thing I did was to get the size of the bag right. I wanted to be able to get the stuff I’d need in it and also for it to be big enough to be able to get all the design detail in. I went for the same size at the orange blog cross-body bag I featured in my blog waaaaay back in April. For the shape, I drew around 2 breakfast bowls overlapping them until I was happy with the oval it created. Once I was happy with the shape I joined the two circles together using straight lines along the top and the bottom. This was the perfect time to mark the centre of the top and the bottom of the pattern. I then got a tape measure and measure the circumference of the oval and made note of it. I then reached for the zip I was going to use for this bag and measured the length. Again, make note of the length and divide it by 2. This gave me the measurement I needed to subtract from either side of the top centre point of the oval front pattern piece. I did this so I could neatly sew the zip into place. From the two measurements I took (the first one-the circumference of the oval and the second The length of the zip), I was able to work out the length I needed to make the side/bottom panel for the bag. I had decided I wanted the bag to be 8cm wide so for the side panels on either side of the zip. The thickness of the teeth on the zip was 1cm so I subtracted this 1cm from the 8cm for the thickness of the bag to be then divided the 7cm by 2 to give me 3.5cm. I drew a line the same length as the zip by 3.5cm wide and then added a 1cm seam allowance around the entire pattern. I used two of these pattern pieces. For the bottom/side panel I drew a line of the circumference of the bag minus the length of the zip by 8cm wide. Again I added a 1cm seam allowance around this pattern piece too. These were the main pattern pieces I used.
For the front panel of the bag, I wanted to add the eyes onto this panel. To do this I cut the front panel out of a black leatherette fabric. I marked on the back of the fabric where I wanted to eyes to sit. When I was happy with the placement of the eyes I then cut the eyes out using a sharp scalpel. When I had finished cutting the two eyes out (I mean you could add as many eyes as you’d like to) I then cut two small pupils out of the black fabric and popped them to one side. I decided I wanted the eyes to be blue so I then took two scraps of blue leatherette fabric and made sure they were bigger than the eye holes and secured them in place using quilting tape. Then comes the tiring and stressful job of stitching these into place. I always do this using a sewing machine but sew it by turning the wheel by hand so I have much more control over making the stitches look neater. A Teflon presser foot helps a load too as there is less friction between the metal and the fabric. Once I had finished securing the blue fabric into place I then did the same with the pupils attaching them to the blue fabric. For the bandages, I got some scrap cotton fabric and cut lengths of fabric 2.5cm thick. I went for a cotton fabric so that the edges would fray and add to the overall look. Then I placed the strips of cotton fabric over the black front panel with the eyes and stitched each strip into place on the sewing machine. I didn’t take much time doing this as the messier it turned out the better it looked! I left an area around the eyes so that you were able to see the eyes and a bit of the black leatherette around them. I wanted the bandages to look as though they were unravelling so I left a strip of fabric hanging just for a point of interest. Once I was done with the bandages I then attached the flanged piping, pinning it in place beforehand. I changed the sewing machine foot to a zipper foot so I could stitch as close as possible to the piece of piping. I did this on the front and the back panels ready to attach the side pieces.

Next comes the zip!!!! I find the easiest way to sew the zip into place is to place the zip on a surface face up and then place the fabric on top of the zip face down. I then stitch along the 1cm seam allowance. I then flattened the zip and fabric making sure the seam allowance is folded under the leatherette and that the zip is lying flat. I then ran it under the sewing machine and top-stitched 5mm from the edge of the fabric making sure the seam allowance will stay in place. I then did the same to the other side and that was the zip done! I then attached folded strips with a D-ring to the centre of the zip. This is so I can add a cross-body strap to the bag. Once these were in place on each side I then attached the bottom side panel creating a loop ready to be pinned to the front and back pieces.

The first thing I did was to attach the side pieces to the front panel matching up all the notches; top and bottom centre points. I then worked my way around keeping the fabric in place with clips. This gave me a good idea as to where I had to work the fabric harder in order to get them to fit. Once it has all been clipped into place I then ran them under the sewing machine using a zipper foot. A zipper foot is the best kind of foot to use because it meant that I could get as close as possible to the flanged piping to make the bag look as neat as possible! I slowly worked the fabric through the machine making sure all edges matched up when it went under the needle. I started with the front side just because this would be the side facing out and that is the side that is more visible and needs to be perfect! I repeated the same on the back panel and all that was left to do was to turn the bag the right way and I was done!!!!

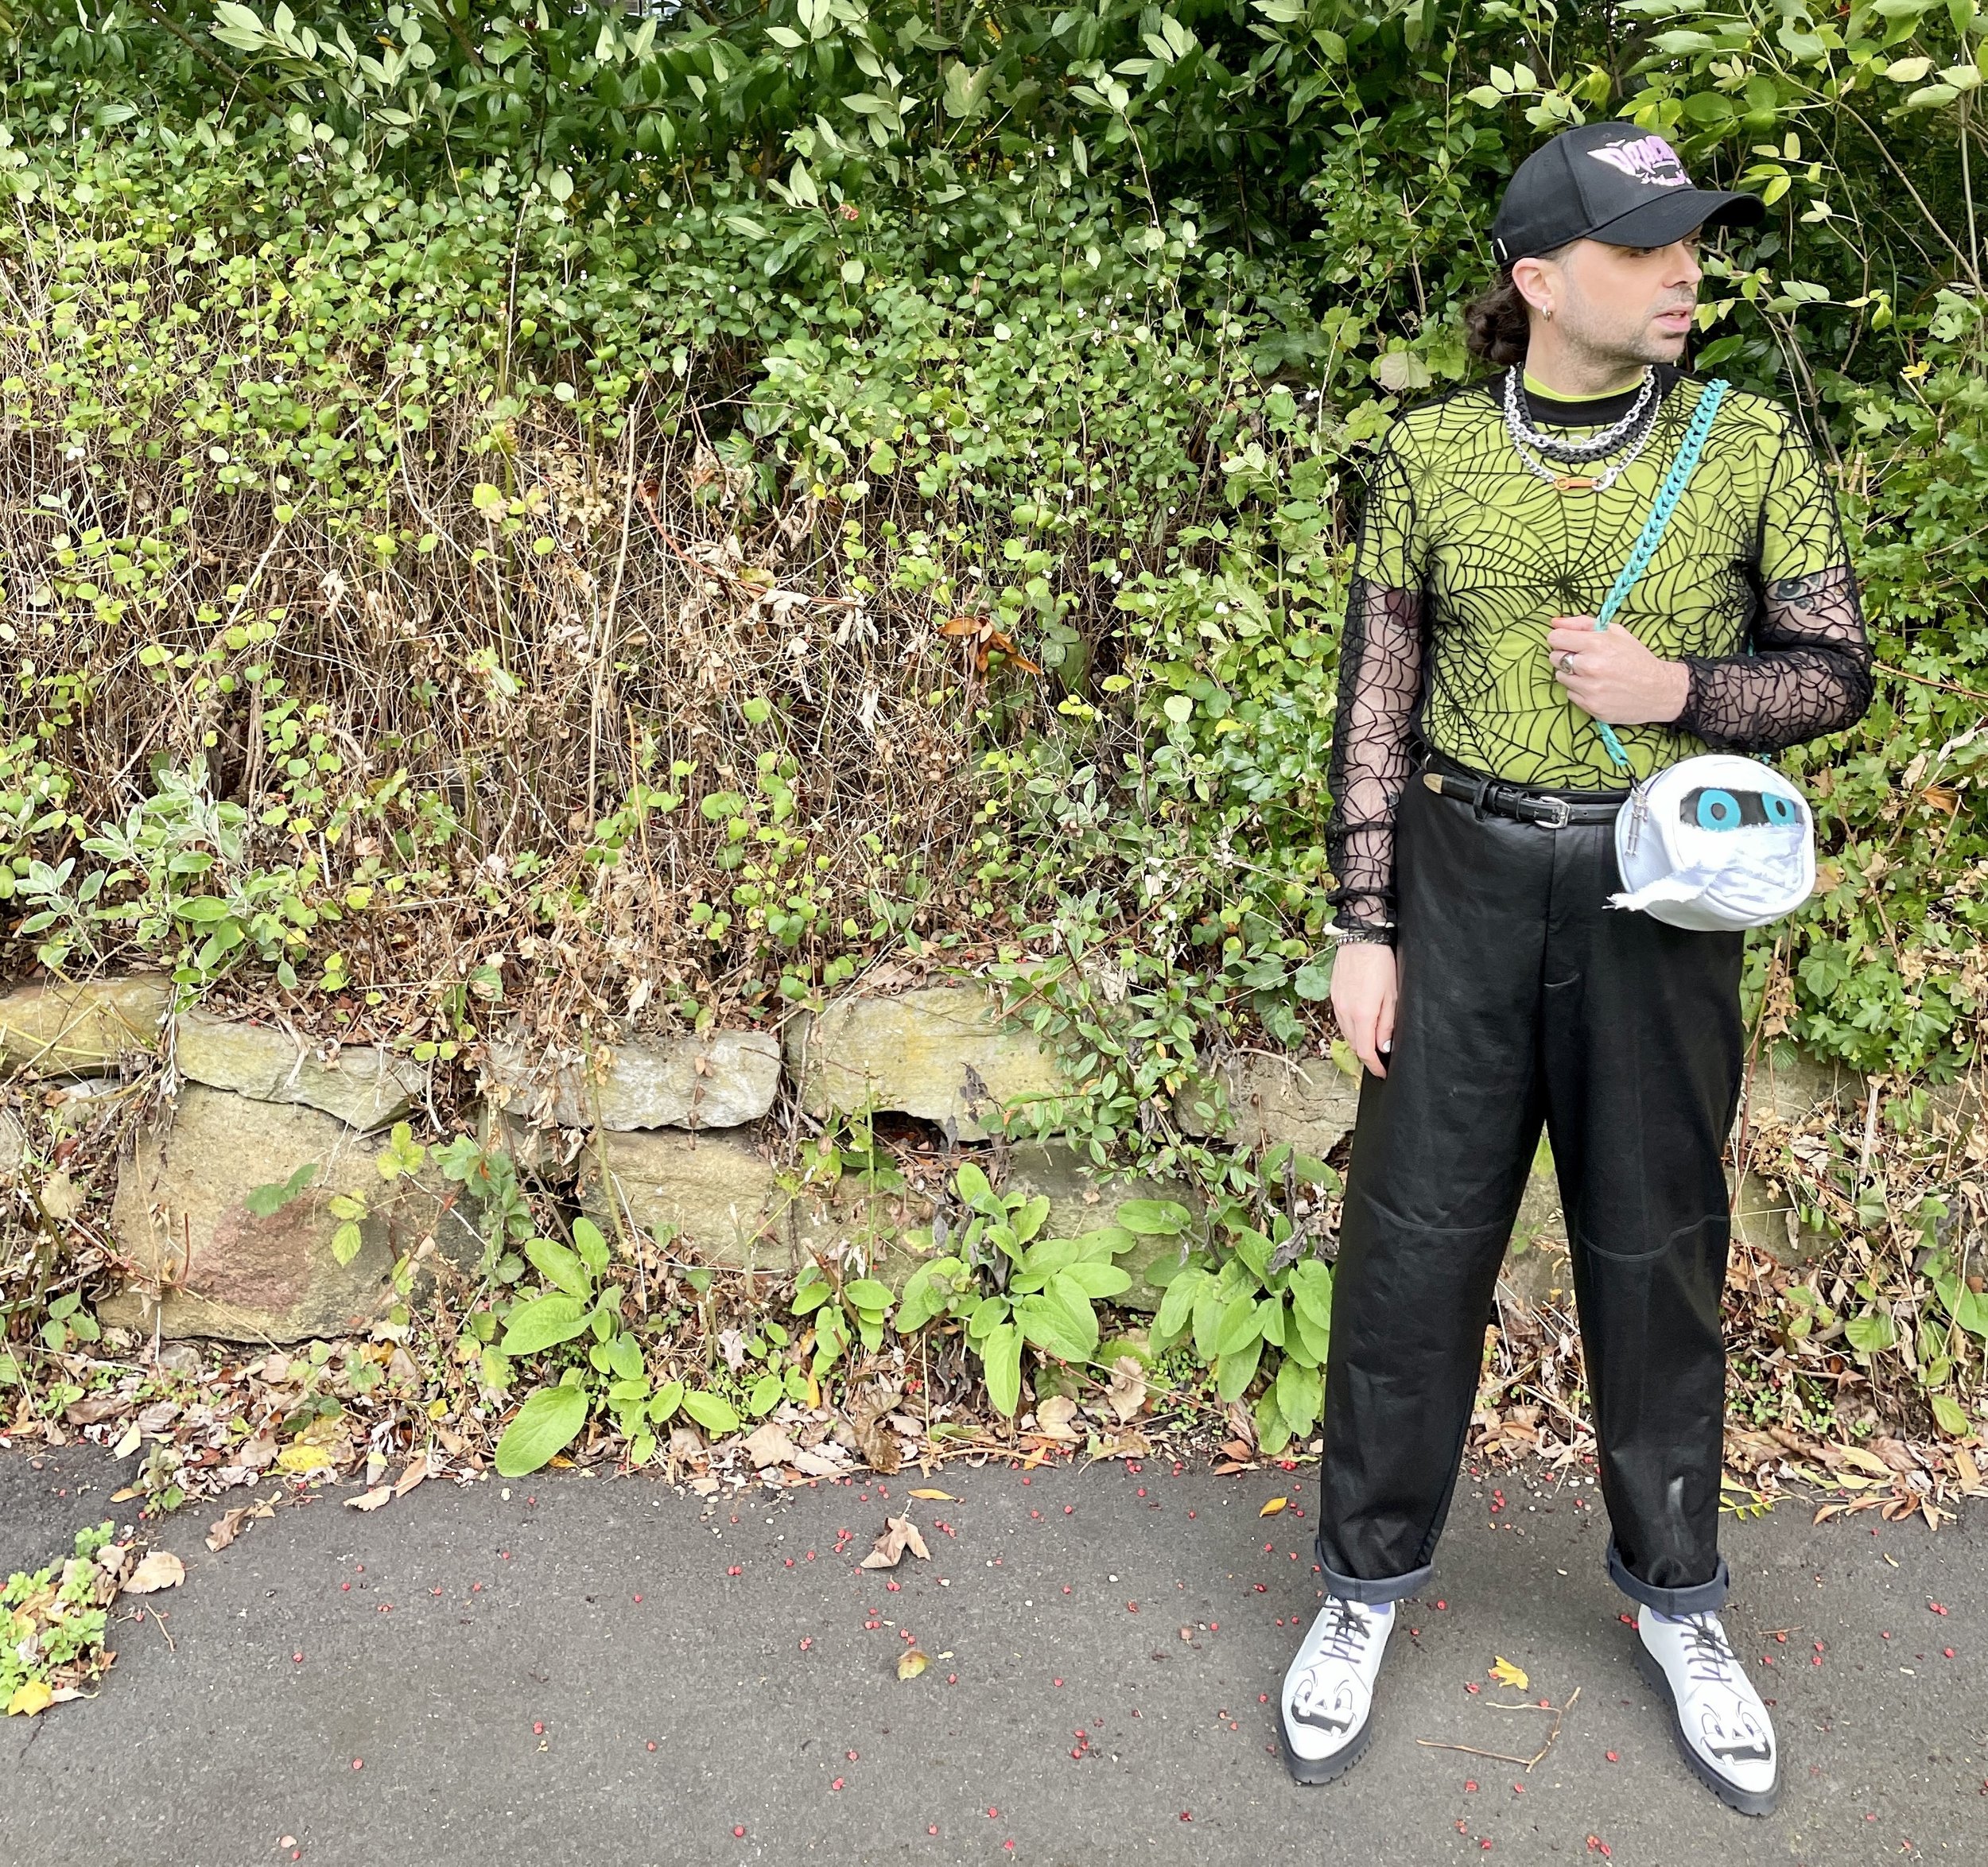
For the strap, I found this chain handle on Amazon. The strap came in a three-pack of marbled plastic curb chain handles for £12. The pack contained a black, white and this incredible turquoise coloured chain. I thought the colour of the chain matched the turquoise eyes perfectly and reminded me of a piece of jewellery from Ancient Egypt. The marbled effect meant that the chain didn’t look flat and new and fit the bag and the theming PERFECTLY!

Now I have been saving these shoes for months. I have wanted them for over a year and managed to pick them up from YOOX. They were reduced to £206 from £400 so I naturally snapped them up. They are from the Moschino Spring/Summer 2020 collection that I love OOOOOOOOH so much. I love the cheeky ghost face on them and would love to get my mitts on a matching belt AND bag for them!!!! I can dream LOL! I would never usually go for a more pointy shoe but I instantly fell in love with these shoes and the thick creeper-like sole really helps!!!!


I hope everyone has a super spooky Halloween!!! Until next year………….. 🎃 🦇 👻
Hat - Ghostly Goods
Ear Rings - ASOS
Chains- - Berska, H&M, ASOS
Green Tee - Collusion - ASOS
Mesh top - ASOS
Bone Bracelet - OS Accessories
Chain Bracelet - H&M
Ring - ASOS
Belt - H&M
Trousers - ASOS
Socks - H&M
Shoes - Moschino - YOOX